Welcome To DWT Listing Theme

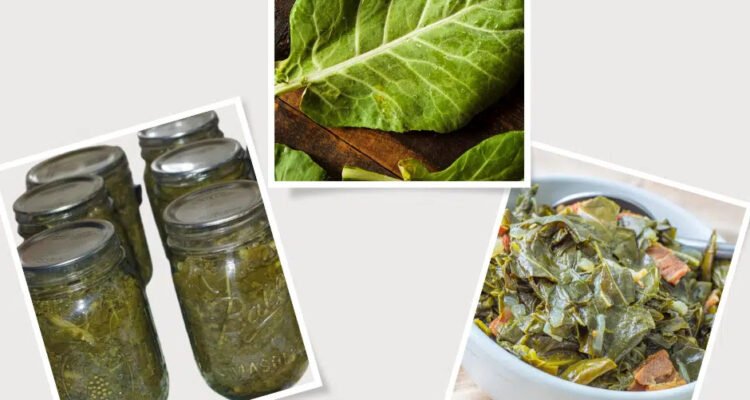
If you’ve ever enjoyed a steaming bowl of collard greens in the middle of winter, you know how comforting and flavorful this Southern staple can be. But did you know you can preserve that farm-fresh taste all year long? With this canning collard greens recipe, you’ll learn everything you need to safely and successfully can collard greens at home—no more freezing or last-minute grocery store runs!
Whether you grow your own greens or buy them in bulk when they’re in season, this guide will walk you through the process of pressure canning collard greens to lock in their nutrients, flavor, and texture. Let’s get started!
Before we dive into the canning collard greens recipe, let’s talk about why you should can collard greens in the first place:
Preservation: Collard greens have a relatively short shelf life when fresh. Canning allows you to preserve them for up to a year or more.
Convenience: Having pre-cooked, canned collard greens ready to heat and eat saves time on busy weeknights.
Flavor: Canned collard greens retain their flavor and texture well, especially when seasoned before canning.
Storage: Canning reduces the need for freezer space and is ideal for off-grid or homestead living.
Low-acid foods like collard greens must be pressure canned to kill harmful bacteria such as Clostridium botulinum. Water bath canning is not safe for collard greens. Make sure you have a pressure canner, not a pressure cooker, and follow USDA guidelines.
Pressure canner
Quart or pint canning jars
New lids and clean bands
Large stockpot
Tongs and jar lifter
Slotted spoon
Funnel
Sharp knife
Large bowl or clean sink for washing greens
Fresh collard greens (about 28 pounds for 7 quarts or 18 pounds for 9 pints)
Water (for blanching and canning)
Salt (optional – ½ teaspoon per pint or 1 teaspoon per quart)
Start by cleaning the greens thoroughly. Collards can carry a lot of dirt, grit, and even bugs, so fill your sink or large basin with cool water and soak the greens. Swish them around, then rinse and repeat at least 2–3 times.
Next, trim off the stems and discard any tough or discolored leaves. Cut the collard greens into 1- to 2-inch strips for easier packing and even cooking.
Blanching helps preserve texture and color during the canning process. Bring a large pot of water to a boil. In batches, add the collard greens and blanch for 3–5 minutes, until they’re wilted but still bright green. Use a slotted spoon to transfer them immediately into a bowl of ice water to stop the cooking process.
After cooling, drain thoroughly and gently squeeze out excess moisture. Set aside.
While the greens are cooling, sanitize your jars in boiling water or a dishwasher cycle. Keep them hot until ready to use. Fill your pressure canner with a few inches of water (check the manual for the exact amount) and begin heating on the stove.
Use a canning funnel to tightly pack the blanched collard greens into jars. Pour boiling water over the greens, leaving 1-inch headspace. Use a bubble remover or plastic utensil to remove air bubbles and adjust headspace if needed.
If using salt, add ½ teaspoon per pint or 1 teaspoon per quart at this stage.
Wipe the jar rims with a clean, damp cloth. Place the lid on top and screw on the band until it’s fingertip tight.
Place the filled jars into the pressure canner. Lock the lid, and vent steam for 10 minutes before closing the vent and allowing the pressure to build.
Processing times:
Pint jars: 70 minutes
Quart jars: 90 minutes
Pressure: 10 PSI for dial-gauge canners or 11 PSI for weighted-gauge canners
(Adjust for altitude as needed—see USDA canning charts)
After processing, turn off the heat and allow the canner to cool completely and depressurize naturally before opening. Do not force the lid open.
Use a jar lifter to remove the jars from the canner. Place them on a towel-lined counter and let them cool undisturbed for 12–24 hours.
After cooling, check for seals. The lids should not flex up or down when pressed. Label your jars with the date and contents, then store them in a cool, dark place.
One of the best things about this canning collard greens recipe is how versatile the final product is. Once canned, these greens are already cooked—just heat and season to your taste.
Here are a few ways to enjoy canned collard greens:
Sauté with onions, garlic, and bacon for a Southern-style side dish
Mix with smoked turkey or ham hocks for added flavor
Stir into soups, stews, or beans for a nutritious boost
Blend into green smoothies (yes, really!) for a healthy twist
Serve over cornbread or grits for a hearty meal
Don’t skip the blanching step. It’s essential for safety and texture.
Tightly pack the jars. Greens will shrink during processing.
Avoid over-processing. Follow the timing exactly to prevent mushy greens.
Use fresh greens. Older or wilted greens won’t can as well and may develop an off flavor.
Try seasoning after opening. You can experiment with flavors like vinegar, hot sauce, or smoked paprika when serving.
It’s best to keep seasoning minimal (just salt) during canning. You can always season after opening. Adding fats or other non-recommended ingredients can make the jar unsafe.
When stored properly in a cool, dark place, home-canned collard greens will last 12–18 months. Always check seals and contents before eating.
It’s possible but not ideal. Fresh greens work best for flavor and texture. If using frozen, thaw and blanch before packing jars.
Floating is normal due to trapped air. You can reduce it by packing more tightly and removing bubbles before sealing.
Preserving collards is more than a chore—it’s a celebration of seasonal abundance and home-cooked tradition. With this canning collard greens recipe, you’ll enjoy the earthy, nourishing taste of greens any time of year.
From garden to pantry, your canned collard greens will be a delicious and convenient addition to meals. So grab your pressure canner, stock up on fresh greens, and let Canning Steps guide you to flavorful success.
Happy Canning!
